Essential RV Setup Checklist: A Step-by-Step Guide
Owning & Maintaining an RV
Essential RV Setup Checklist: A Step-by-Step Guide
By Searchshop Editorial Team14 min readJuly 11, 2024Updated January 2, 2026
Some links in this article are affiliate links. If you buy through them, Searchshop may earn a commission at no extra cost to you. Learn how this works.
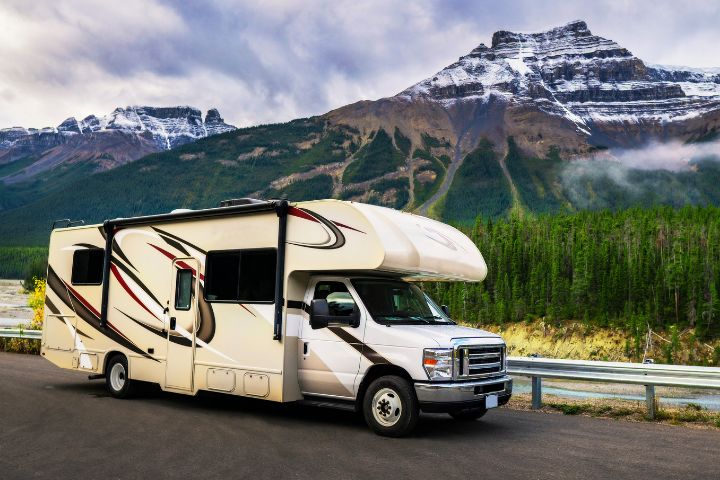
Embarking on an adventure in a recreational vehicle (RV) requires more than just driving to a picturesque location and enjoying the view. Following a comprehensive RV setup checklist ensures a stress-free and enjoyable experience. This guide covers all the essential steps for setting up a camper at a campsite, from initial arrival precautions to ensuring your campsite feels like home. Whether you are a seasoned traveler or diving into the RV lifestyle for the first time, understanding how to set up a travel trailer or camper can significantly enhance your outdoor experience.
This article will walk you through a detailed step-by-step RV setup checklist, including the ins and outs of RV installation, stabilizing your RV, connecting utilities, andoptimizing comfort and functionality. Our guide aims to equip you with the knowledge needed for a seamless RV campsite setup, addressing common questions such as RV setup for beginners and providing a travel trailer setup checklist. By the conclusion, you will be familiar with the basics of RV outdoor setup and the nuances of RV setup and breakdown checklist, ensuring that you are well-prepared for your journey ahead.
ARRIVAL AND INITIAL PRECAUTIONS
Pre-Arrival Checklist
Before embarking on the journey, travelers must prepare a comprehensive pre-travel checklist to ensure all necessary precautions are taken. This checklist should include checking the RV's dimensions, such as length, width, and height, to ensure it fits in the intended parking spaces and avoids obstructions. Additionally, travelers should measure the minimum clearance needed to safely navigate under any overhead obstruction, such as low bridges or tree limbs, which can be found in the owner’s manual or measured manually.
Checking for Obstructions
Shop RVs For Sale
Browse current rvs from dealers near you — updated daily.
Upon arrival at the destination, the first task is to carefully select a parking spot that is as flat and level as possible. This selection process involves a visual inspection of the area for low-hanging branches, tight corners, or other potential hazards that could impede the RV's ability to park safely. It is advisable to have GPS, such as the Rand McNally TripMaker RVND 7720, which considers the RV’s height and suggests the best routes and parking strategies.
Travelers should also perform a physical check around the parking area before settling in. This includes walking around the campsite to inspect for low branches and bushes, and ensuring the terrain is level enough for safe parking and setup. Attention should also be paid to overhead obstacles to prevent any damage to the RV.
By following these initial precautions and utilizing a detailed checklist, RV travelers can significantly enhance their safety and readiness for a pleasant camping experience.
STABILIZING YOUR RV
Setting the Parking Brake
Properly setting the parking brake is crucial for stabilizing an RV. One often encounters issues where the emergency brake does not hold the vehicle effectively, indicating it requires adjustment. To adjust the parking brake, individuals need a wrench to modify the adjustment bracket and a screwdriver to turn it. It is important to ensure the brake engages correctly, starting to resist about halfway through the pedal's travel to prevent the brake shoes from dragging on the drum, which can lead to overheating and damage.
For RVs like the 1996 Fleetwood Southwind, the process involves pushing the foot pedal down with no resistance, which should not be the case. Adjustments are made by accessing the brake system underneath the RV, cleaning any gunky areas, and adjusting the cotter pin or clip that holds the assembly together. This adjustment ensures that the brake engages properly without being overly tight, which could cause the brake to drag and potentially start a fire.
Using RV Jack Pads
When leveling an RV, using the right support for jack pads is vital for stability. RV enthusiasts often use various materials for this purpose, including wood blocks, plastic leveling blocks, and specially designed jack pads made from recycled rubber. These materials help distribute the weight evenly and prevent the RV from sinking into soft ground.
The choice of material can depend on the terrain and personal preference. For instance, some prefer the durability and stability of recycled tire rubber pads, which perform well on various surfaces, including gravel. Others opt for wooden blocks, such as 2x12 treated wood, which are cut to specific sizes to support the jacks effectively. It is crucial to ensure the pads are stable and on solid ground, especially when stacking blocks to cope with uneven terrain.
By following these steps and using suitable materials, RV owners can ensure their vehicle remains stable and secure at the campsite, enhancing safety and comfort during their stay.
UTILITY CONNECTIONS
Water Connection Safety
SE
Written by
Searchshop Editorial Team
Vehicle research & buying-guide team
The Searchshop editorial team researches and writes buying guides, model reviews, and category roundups across RVs, boats, motorcycles, ATVs, autos, and snowmobiles. We combine hands-on product research, live dealer inventory data, and manufacturer specifications to help buyers make confident decisions.
Reviewed by Searchshop Review Board — credentialed industry professionals.