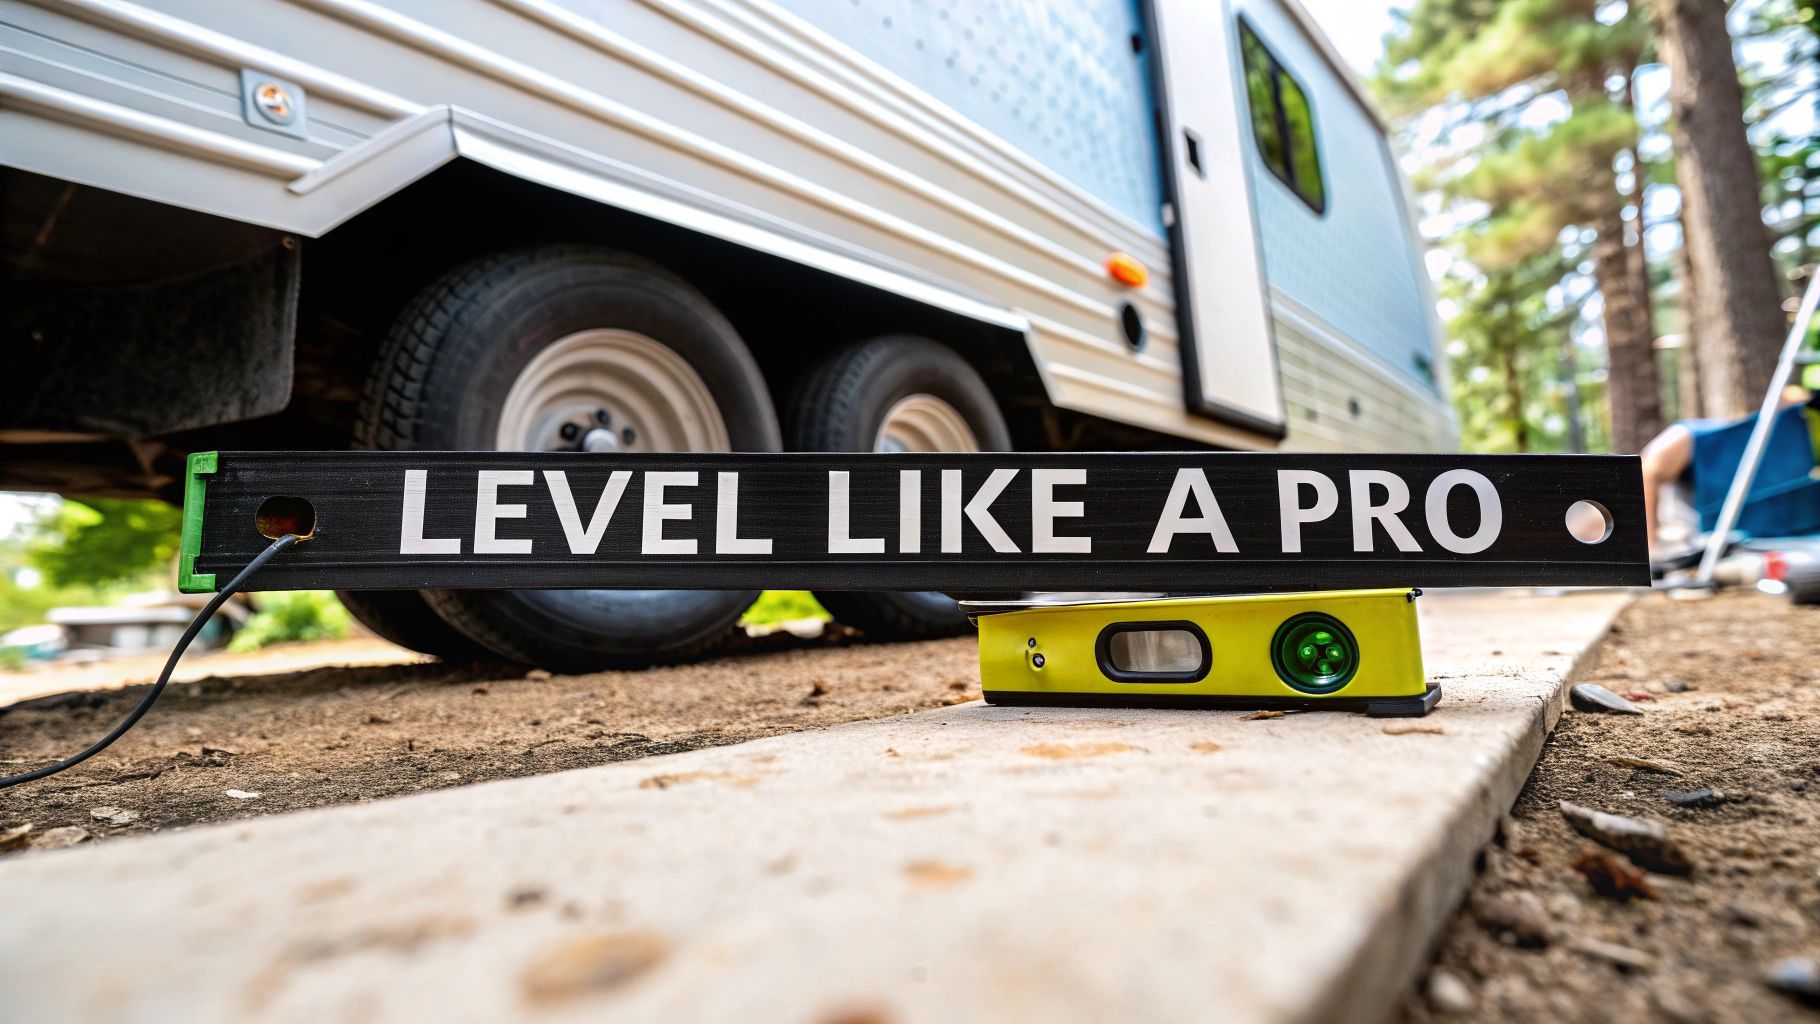
Before you even think about backing into that perfect campsite, let's talk about gear. Getting your trailer level isn't a dark art; it's about having the right tools on hand. With the right kit, what could be a frustrating chore becomes a smooth, 15-minute part of your setup routine.
The absolute must-haves are a reliable level, a set of sturdy leveling blocks, and some heavy-duty wheel chocks. Get these right, and you're set for success.
Your Essential Toolkit for a Perfectly Level Trailer
A level trailer is the bedrock of a great camping trip. It's not just about comfort—although nobody enjoys sleeping on a slope. If your rig isn't level, your fridge might not cool properly, water can pool in your sinks instead of draining, and your doors might swing open or shut on their own.
Building your toolkit doesn’t have to break the bank, but choosing quality components will save you headaches down the road. Think of it as your go-to arsenal for tackling any kind of campsite terrain.
Once you have these items, the entire arrival process feels much less chaotic. For a full rundown of what to do from the moment you pull in, check out our complete essential RV setup checklist.
The Heart of the Operation: The Level
First things first: you need a level. Without an accurate way to measure, you're just eyeballing it, and that rarely ends well. You've got a few solid options here.
- Bubble Levels: The old-school, tried-and-true method. A simple 2-foot carpenter's level placed on the floor just inside your trailer door never fails. Many RVers also mount small bubble levels on the front and side of the trailer for a quick glance from outside.
- Smartphone Apps: There's an app for that, and leveling is no exception. Your phone’s internal sensors are surprisingly accurate, making these apps a convenient, no-cost option.
- Electronic Systems: If you want to eliminate all guesswork, a system like LevelMatePRO is fantastic. You mount a small Bluetooth sensor inside your trailer, and an app on your phone tells you exactly how many inches each side needs to come up. It’s a game-changer for many.
To help you decide what's best for you, here’s a quick comparison of the most common leveling tools.
Leveling Tool Comparison: Manual vs. Digital
Choosing the right level really comes down to your budget and how much guesswork you want to take out of the process. Whether you prefer a classic bubble level or a high-tech electronic system, the goal is the same: getting it right the first time.
| Tool Type |
Pros |
Cons |
Best For |
| Bubble Level |
Inexpensive, reliable, no batteries required. |
Requires you to go inside/outside to check; can be less precise. |
Budget-conscious RVers and those who prefer a simple, classic approach. |
| Smartphone App |
Free or low-cost, always with you, provides a digital readout. |
Requires a phone, drains battery, accuracy can vary by device. |
Campers who want a step up from a bubble level without buying new gear. |
| Electronic System |
Extremely precise, tells you exact height needed, fast and convenient. |
Most expensive option, requires installation and a smartphone. |
RVers who value speed, precision, and want to eliminate the trial-and-error. |
Ultimately, any of these tools will get the job done. The key is to pick one you're comfortable using every time you set up camp.
Raising Your Rig: Leveling Blocks
Once you know which side of the trailer is low, you need to lift it. This is where leveling blocks come in. The big debate in the RV community has always been wood versus plastic.
You can easily make your own wooden blocks from 2x8 or 2x10 lumber, which is definitely the cheapest route. But they're heavy, can get waterlogged and muddy, and eventually will split or rot.
That's why most people have switched to interlocking plastic leveling blocks. They're lightweight, incredibly durable, and stack like Legos for a secure lift. They don't absorb water, are easy to clean, and store neatly. They cost more upfront, but their convenience and longevity make them a worthwhile investment for most campers.
Pro Tip: Never, ever use your stabilizer jacks to level the trailer. They are designed only to stabilize the rig and prevent bouncing once it's already level. Trying to lift the trailer's weight with them can bend the jacks or, even worse, damage the frame. It's a costly mistake.
Safety First: Wheel Chocks
This is the one step you can't skip. Before you unhitch or start leveling, you absolutely must chock the wheels. Wheel chocks are a non-negotiable safety item that keeps your trailer from rolling away while you work.
Splurge a little here. Those cheap, hollow plastic chocks can slip. Heavy-duty rubber or solid plastic chocks provide far better grip and peace of mind.
With roughly 80% of first-time RV buyers choosing towable trailers that need this kind of manual setup, these tools are always in high demand. It’s no surprise that online searches for 'RV leveling blocks' skyrocket every March and June as people gear up for camping season.
For those with exceptionally heavy rigs or unique situations requiring fine-tuned vertical adjustments, an advanced tool like a hydraulic lifting trolley could even be considered for precise positioning, though it's overkill for most travel trailers.
Mastering the Side-to-Side Leveling Process
You’ve pulled into your campsite and chocked the wheels. Now for the fun part: leveling your travel trailer. Getting the side-to-side balance right is arguably the most challenging step, especially when you're dealing with a less-than-perfectly-flat patch of earth. But nail this, and the rest of the setup is a breeze.
First things first, get a feel for the site. Before you even think about unhitching, step back and eyeball your rig from the front or rear. You can usually see which side is dipping. Next, grab your level—a classic carpenter’s level, a level app on your phone, or one of those handy mounted bubble levels—and place it on a reliable surface inside, like the floor or countertop. This confirms which side is low and needs a boost.
Reading the Site and Placing Your Blocks
Let's paint a picture. You've backed into a killer spot, but it slopes noticeably to the passenger side. Your level confirms it; the bubble is way over to the right. This is where your leveling blocks or ramps earn their keep.
You’ll need to build a small ramp with your blocks right in front of the tires on the low side—in this scenario, the passenger side. The idea is to create just enough height to bring that side up to level.
Here’s how I usually tackle it:
- Estimate the Height: Your level is your guide. If you have a fancy system like a LevelMatePRO, it’ll tell you the exact height you need, like "1.5 inches". If you're using a simple bubble level, a good rule of thumb is to add one block for every half-bubble it's off-center.
- Build Your Ramp: Stack your interlocking blocks on the ground, making sure they're snug and stable. Place them directly in front of the tire(s) on the low side. For a tandem axle trailer, you'll need to build a ramp for both tires to climb.
- Drive Up Slowly: This is a team sport if you have a spotter. Ease your tow vehicle forward, guiding the trailer tires smoothly onto the blocks. The trick is to stop right in the center of the blocks. Don't overshoot!
Overshooting is a classic rookie mistake, and even veterans do it from time to time. If it happens, no sweat. Just back down, reset your blocks, and give it another go. Patience is your best friend here.
This visual gives you a great overview of the initial steps.
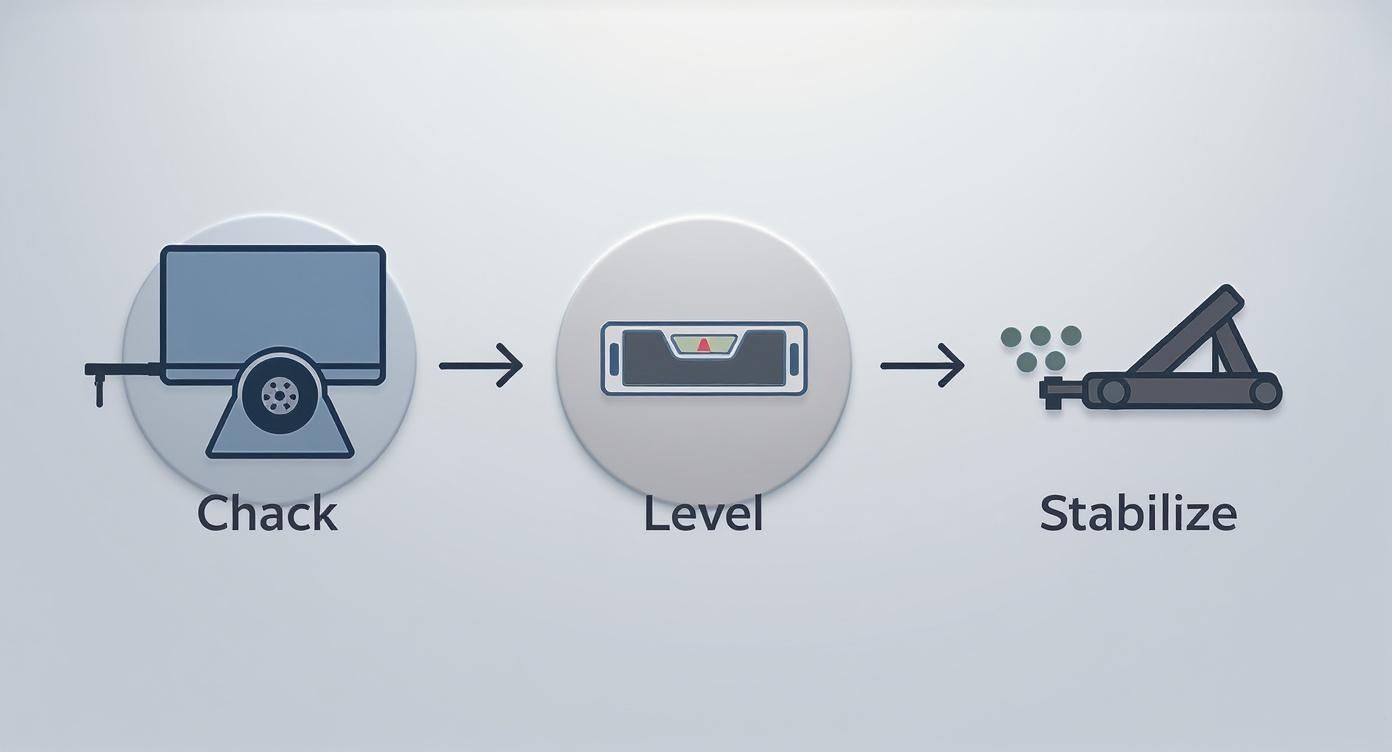
As the infographic shows, chocking your wheels isn't just a suggestion; it's the absolute first thing you must do for safety before you start leveling.
Fine-Tuning for a Perfect Level
Once you’re up on the blocks, put your truck in park and check the level again. Getting it perfect on the first shot is rare, so don't be discouraged. You’ll likely be close, but maybe a little high or still a bit low.
Now it's time for the micro-adjustments. If you're still low, you might need to add one more block or a thinner shim. If you overshot the mark and went too high, you have to back off and take one away. This little back-and-forth is totally normal, especially when you're new to the process.
A Real-World Scenario: Say you pulled onto a stack of three blocks, but your level shows you're still just a hair low. Instead of backing all the way off to rebuild the stack, you might just need to add a thin, half-inch leveling plate on top. These small tweaks can save you from starting the whole process over.
A popular alternative to traditional blocks is a set of curved levelers, sometimes called leveling wedges. With these, you just slide the thick end of the wedge under the tire on the low side. Then you simply drive forward until your level reads perfectly dead-center. Once it's level, you slide a second chock piece under the wedge to lock it in place. They’re great because they eliminate the guesswork of stacking blocks, offering a variable lift from about a half-inch up to four inches.
Whatever tools you prefer, the goal is always the same: get that bubble sitting perfectly between the lines. Taking the time to get this side-to-side process down will make every arrival at the campground smoother and ensure everything inside your rig—especially the fridge—works exactly as it should.
Getting the Front-to-Back Level Just Right

Alright, if you've got your trailer leveled side-to-side, you've already done the heavy lifting. Seriously, that's the toughest part. Now it's time to handle the front-to-back pitch, which is a whole lot easier. This part of the job relies on one simple tool: your tongue jack.
Getting this right is just as important for your comfort and for making sure everything inside the rig works like it should. Think of it this way: water needs to drain, your fridge needs to function properly, and nobody wants to feel like they’re sleeping on a hill.
Your Tongue Jack is Key
The tongue jack is the workhorse for this step. Its whole purpose is to raise and lower the front of your trailer so you can get that pitch dialed in perfectly. Whether you have a manual crank or a slick electric jack, the process is exactly the same.
Before you do anything else, take a second to walk around and confirm your wheel chocks are still wedged tightly against the tires. This is a crucial safety check you should never skip before unhitching. With the wheels secured, you can go ahead and uncouple the trailer.
Unhitching and Finding Your Sweet Spot
First, while still hitched up, use the tongue jack to lift the front of the trailer just a tad. This takes the pressure off the hitch ball and makes it a breeze to unlatch the coupler.
Once it's unlatched, keep raising the jack until the coupler is completely clear of the ball. Now you can pull your tow vehicle forward and out of the way.
So, where's the best spot to place your level for this? You want a surface that runs lengthwise down the trailer. I've always found that the floor just inside the doorway gives the most reliable reading for the actual living space. Some people use the A-frame or the bumper, but the interior floor tells you what you’ll actually feel inside.
Expert Insight: Remember, the goal is to level the surfaces you live on. Your refrigerator is especially sensitive and needs to be level to work right and avoid damage. A level floor is the best way to ensure a level, happy fridge.
Dialing It In
With your level in place, you’re ready for the final, easy adjustments.
- Read the Bubble: Take a look at your level. If the bubble is toward the front of the trailer, the nose is too high and you need to lower it. If the bubble is hanging out at the back, you’ll need to raise the front.
- Adjust Slowly: Use your tongue jack to make small, controlled changes. If you have an electric jack, just use short bursts. With a manual crank, a few turns at a time is plenty.
- Check and Repeat: After each tiny adjustment, check the level. You'll see the bubble creep closer to the center. Keep at it until that bubble is sitting perfectly between the lines.
This little back-and-forth usually takes less than a minute but makes a world of difference.
For instance, if you get set up and notice water isn't draining from the kitchen sink, a quick tweak to your front-to-back level with the tongue jack will almost always fix it. Once you're perfectly level in both directions, you can finally drop the stabilizer jacks and enjoy a rock-solid campsite.
The Final Touch: Getting a Rock-Solid Setup
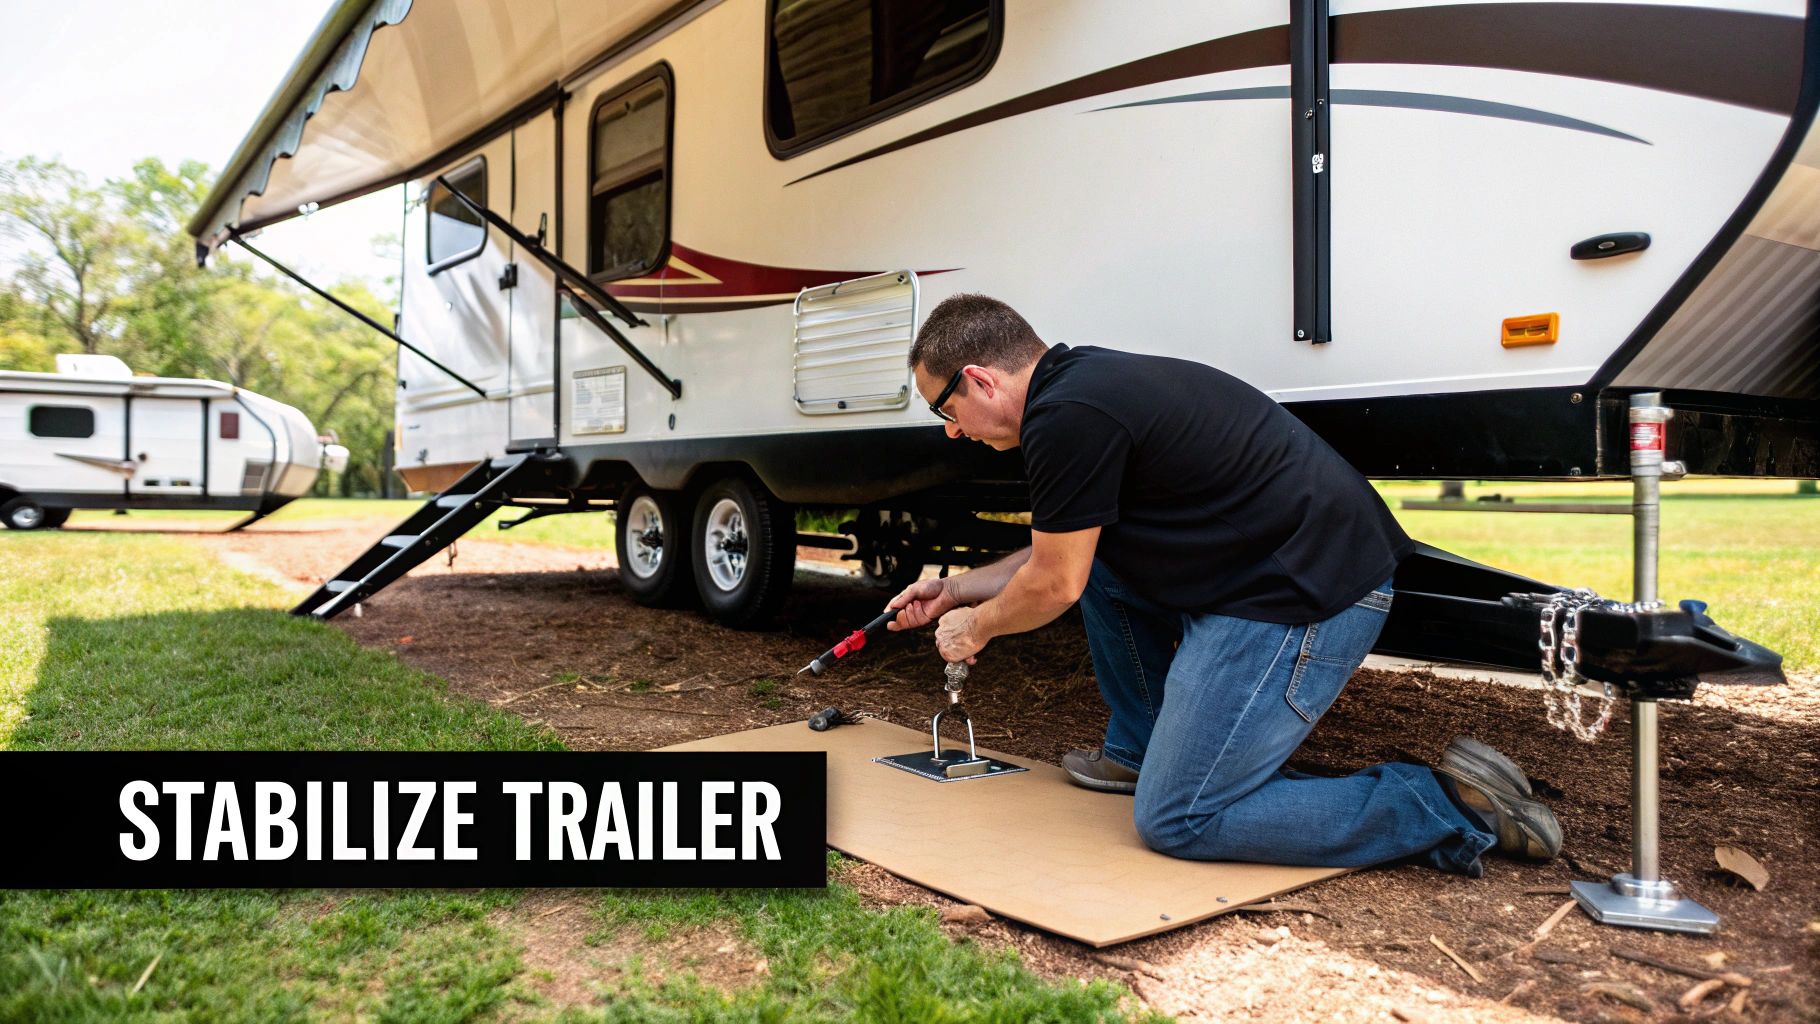
You’ve done the hard part. Your rig is sitting perfectly level, both side-to-side and front-to-back. But before you kick back and relax, there's one last step that makes all the difference: stabilizing. This is what takes your trailer from a wobbly box on wheels to a firm, comfortable home base.
It's a common rookie mistake to mix up leveling and stabilizing, but they’re two totally different things. Leveling gets your trailer into the right position. Stabilizing locks it in place, getting rid of that annoying bounce and sway you feel every time someone walks around inside.
Using Your Stabilizer Jacks the Right Way
Your trailer has a stabilizer jack at each corner, and their only job is to provide downward pressure to stop the rig from moving. I can't stress this enough: they are not meant to lift the trailer's weight. Trying to level your RV with them is a fast track to bending the jacks or, worse, damaging your trailer’s frame.
Getting them down is straightforward, but it’s more about finesse than force.
- Start by lowering the two jacks at the back of the trailer, then move to the front ones. You can use the hand crank it came with, but most seasoned RVers use a cordless drill with the right socket bit—it saves a ton of time and effort.
- Your goal is to bring each jack down just until its foot makes solid contact with the ground or the block you've placed under it. You’ll feel the tension build.
- The moment it feels snug, stop. An extra quarter-turn is usually all you need. If you see the trailer start to lift at all, you've gone too far and need to back it off a bit.
This isn't about jacking up the trailer; it's about taking the slack out of the suspension. Once all four jacks are snugged down, you'll immediately feel how much more solid the trailer is.
Want Even More Stability? Try These Upgrades.
The standard jacks get the job done, but if you want that "set in concrete" feeling, a few aftermarket upgrades can make a huge difference. The RV accessories market is booming—it was valued at USD 14.1 billion in 2023 and is only getting bigger. We’re seeing a ton of innovation, with investment in RV-related startups hitting USD 34 million in early 2024 alone.
A level trailer that still wobbles is a frequent complaint. The problem is usually lateral (side-to-side) motion, which standard vertical jacks don't fully address. That's where cross-bracing and chocking solutions come in.
For a truly immovable setup, these are two of the most popular and effective additions you can make:
- Stabilizer Cross-Braces: These are simply adjustable bars that connect your opposing stabilizer jacks, creating a rigid triangle. It's a simple concept, but it drastically reduces the side-to-side wiggle that drives so many people crazy.
- X-Chocks: If you have a tandem axle trailer, X-Chocks are a must-have. They fit between your tires and expand, locking the wheels together so they can’t shift. This completely stops that subtle rocking motion that comes from the tires flexing.
Making stabilizers a regular part of your setup doesn't just make your stay more comfortable; it also cuts down on long-term stress on your trailer's frame and components. For more on this, our RV maintenance checklist offers tips to avoid common pitfalls.
Taking a few extra minutes to stabilize properly is the finishing touch that turns a good campsite into a great one.
Exploring Advanced and Automatic Leveling Systems
After you’ve wrestled with leveling blocks and a bubble level a few times, the idea of just pushing a button and walking away starts to sound pretty amazing. That’s the promise of automatic leveling systems, and they’re no longer just for massive Class A motorhomes. More and more, we're seeing these high-tech setups offered on travel trailers, and for campers who value a quick, painless setup, they're a total game-changer.
Instead of you fiddling with blocks and cranks, these systems use a network of sensors and heavy-duty jacks to do all the work. You hit a button, and an onboard computer figures out exactly how the trailer is sitting. It then deploys its jacks to handle both the side-to-side and front-to-back leveling at the same time. What used to be a 15-minute job becomes a two-minute, hands-off affair.
The Tech Behind Push-Button Perfection
So, how does it work? At the heart of it is a central control module—basically, the system's brain. It gets constant feedback from sensitive leveling sensors mounted on the trailer's frame. These sensors tell the controller precisely which corners are high and which are low.
This kind of smart technology is quickly becoming the new standard. In fact, the market for RV leveling sensors was valued at around USD 780 million in 2024 and is expected to balloon to USD 1.54 billion by 2033. Campers are clearly embracing electronics that make life on the road easier, and manufacturers are listening. You can read up on the trend in a recent RV leveling sensor market analysis.
Once the controller has its instructions, it signals the jacks to get to work. There are two main flavors here:
- Electric Jacks: These use strong electric motors to lower and raise the jack legs. They're typically lighter, quieter, and a bit simpler to maintain.
- Hydraulic Jacks: These use fluid pressure for serious lifting muscle. They're incredibly powerful and fast, which is why you’ll often find them on bigger, heavier trailers that need that extra oomph.
Key Takeaway: The biggest advantage of an auto-leveling system is its repeatable precision. It takes all the guesswork out of the equation and gives you a rock-solid, perfectly level trailer every single time, often in less than two minutes.
Is an Automatic Leveling System Worth It?
Jumping to an auto-leveling system is a big decision, and it’s smart to weigh the pros and cons. The convenience is off the charts. Imagine pulling into your site after a long drive, hitting one button, and having the trailer level itself while you start hooking up your water and power. For a lot of people, that’s worth the price of admission right there.
Let's do a quick side-by-side comparison to see how the two approaches stack up.
Manual Leveling vs Automatic Leveling Systems
| Feature |
Manual Leveling |
Automatic Leveling |
| Cost |
Low (cost of blocks, levels, and wheel chocks) |
High (can be a multi-thousand dollar upgrade) |
| Speed & Effort |
Takes 10-20 minutes; requires physical effort |
Takes 1-3 minutes; push a button and you're done |
| Precision |
Good, but depends on user skill and patience |
Excellent, digitally precise every time |
| Weight Added |
Minimal (a few pounds for blocks) |
Significant (can add 150-200+ lbs) |
| Maintenance |
Almost none, just keep blocks clean |
Requires periodic checks of fluid or electricals |
| Best For |
Budget-conscious campers, weekend warriors |
Frequent travelers, solo campers, those with mobility issues |
Of course, that convenience comes at a cost. These systems aren't cheap, whether you get one from the factory or add it on later. The installation is also pretty involved, often best left to a professional. You also have to account for the extra weight, which will cut into your trailer's overall cargo capacity. If you're already towing close to your limit, it's a serious consideration. You can learn more about managing your trailer's weight by exploring our resources on hitch and tow setups.
So, what’s the verdict? An automatic leveling system is a fantastic upgrade for anyone who camps frequently, has physical limitations, or just wants to make setting up camp as easy as humanly possible. But for the casual camper who doesn't mind the hands-on process, the classic manual method is still a perfectly reliable and budget-friendly way to get the job done.
Common Questions About Leveling Your Travel Trailer
Even after you've leveled your rig a dozen times, questions still pop up. Every campsite throws a new curveball, and real-world situations rarely match the manual. This section is all about tackling those common head-scratchers we hear from new and seasoned RVers alike.
Think of this as your go-to troubleshooting guide. Whether you're wondering if you can skip a step on a quick overnight or you've pulled into a site that looks more like a ski slope, we've got you covered.
Do I Really Need to Level for a Quick Overnight Stop?
Yes, you really should. I know it’s tempting to skip it when you’re just pulling into a rest stop for a few hours, but taking a couple of minutes to get reasonably level is a really smart move. There are two big reasons why.
First is your refrigerator. Most travel trailer fridges are absorption-style, meaning they rely on gravity and a heat source to circulate coolant. If you run one on a serious slant, that coolant can pool and cause permanent, expensive damage. It’s the number one appliance-killer in an unlevel rig.
Beyond that, it's just about comfort. Trying to sleep on an angle is surprisingly difficult. You’ll also find cabinet doors swinging open on their own and your coffee mug sliding right off the counter. You don't need to get it perfect for a quick stop, but getting it close will protect your fridge and help you get a decent night's sleep.
Can I Just Use My Stabilizer Jacks to Level the Trailer?
This is probably the most common—and most damaging—mistake you can make. The answer is a hard no. Stabilizer jacks are designed to do exactly what their name says: stabilize the trailer from bouncing around after it’s already level.
They simply aren't built to bear the trailer's weight. If you try to lift a corner of your RV with a stabilizer jack, you’re asking for trouble. You can easily bend the jack, twist its mounting bracket, or even damage the trailer's frame.
Always follow the proper order:
- Level the trailer from side to side using blocks or ramps under the tires.
- Then, level it from front to back using your tongue jack.
- Only then should you lower the stabilizer jacks until they're just snug against the ground. They're the final touch, not the main tool.
Picture This: You're at a campsite where the rear passenger side is low. The right way to handle it is to back that tire onto leveling blocks. The wrong—and dangerous—way is to try and crank down the rear stabilizer jack to lift that whole corner. That puts a massive amount of stress on a part that was never meant to be a jack.
What’s the Best Type of Level to Use?
Honestly, the "best" level comes down to what works for you. It's a mix of personal preference, budget, and how much tech you want to bring into the process. There's no single right answer, but here are the most popular choices I see out there:
- A Simple Carpenter's Level: It doesn’t get more reliable than this. A 2-foot bubble level placed on the floor right inside the door is accurate, cheap, and never runs out of batteries. It’s the old-school method that always works.
- Mounted Bubble Levels: Lots of RVers stick small bubble levels on the front and side of their trailer. They give you a quick visual from outside so you don't have to keep running in and out to check.
- Smartphone Apps: You always have your phone with you, right? The level apps today are surprisingly accurate and super convenient.
- High-Tech Electronic Systems: For the ultimate convenience, a system like the LevelMatePRO is fantastic. It uses a Bluetooth sensor in your rig to tell your phone exactly how many inches you need to raise each side. It totally removes the guesswork.
Many campers, myself included, use a combination. I might use the mounted levels for a quick reference while backing in, then grab the carpenter's level for the final, precise adjustment inside.
What If My Campsite Is Extremely Uneven?
Sooner or later, you'll pull into a site that looks completely impossible. The very first thing you should do is see if you can switch to another, flatter site. It’s always the easiest solution.
If you’re stuck with it, you have to be careful. Stacking leveling blocks more than 4-5 inches high starts getting wobbly and unstable. In these extreme cases, curved leveling wedges are often a much safer option because they provide a solid, continuous ramp. You might also need to put a sturdy block under your tongue jack if the front has to go way up; overextending the jack itself is risky.
Bottom line: if leveling the site requires you to push all your gear to its absolute limit, it might be safer to just find another spot. Pushing things too far puts a ton of stress on your trailer's frame and your equipment, which is the last thing you want on a relaxing trip.
Ready to find the perfect travel trailer for your next adventure? At Searchshop, we make it easy to browse a huge selection of new and used RVs. Find the right rig for your travel style and hit the road with confidence. Start your search today.