How to Winterize RV: Expert Tips & Step-by-Step Guide
Shopping for an RV
How to Winterize RV: Expert Tips & Step-by-Step Guide
By Searchshop Editorial Team21 min readOctober 20, 2025Updated January 2, 2026
Some links in this article are affiliate links. If you buy through them, Searchshop may earn a commission at no extra cost to you. Learn how this works.
If you own an RV and live anywhere that sees freezing temperatures, learning how to winterize your rig isn't just a suggestion—it's one of the most critical pieces of seasonal maintenance you'll ever do. Protecting your investment, whether it's a brand new motorhome or a trusted travel trailer, is key to ensuring years of adventure. It's all about getting every last drop of water out of your plumbing and protecting it with non-toxic antifreeze. A little work now saves you from a world of expensive, heartbreaking damage later.
Why You Absolutely Cannot Skip Winterizing
Let's get straight to the point. When water freezes, it expands. Inside the tight confines of your RV’s plumbing—the pipes, the water heater, the faucets—that expansion is powerful enough to crack fittings and burst lines. It's a costly and messy lesson to learn the hard way.
Trust me, the repair bills are no joke. RV service centers in colder climates say that nearly 20% of their spring repairs are from freeze-related damage. Those repairs often run between $500 and $1,500, and that's before you even account for the water damage that can seep into your walls and floors. For a deeper dive into RV ownership trends and maintenance data, you can check out some of the reports from the RV Industry Association.
The Two Core Winterizing Methods
When it comes to protecting your plumbing, you really have two main paths you can take. Both get the job done, but one might fit your style or equipment better than the other.
The Antifreeze Method: This is the most common and arguably the most foolproof approach. You'll pump that distinctively pink, non-toxic RV antifreeze through every single pipe, faucet, and toilet. The antifreeze pushes out any lingering water and ensures that even if a few drops remain, they can't freeze and expand. It gives you total peace of mind.
The Compressed Air Method: If you'd rather not deal with antifreeze, you can use an air compressor to literally blow all the water out of your lines. It’s faster, and you don’t have to spend time flushing the system in the spring. The catch? You have to be meticulous. Even a small, hidden pocket of water can freeze and cause a crack.
Comparing RV Winterizing Methods
To help you decide which route to take, here's a quick breakdown of the two primary winterizing methods.
Method
Description
Best For
Antifreeze Method
Involves filling the entire plumbing system with non-toxic RV antifreeze, which displaces water and prevents freezing.
RV owners who want the most thorough protection and don't mind flushing the system in the spring. Ideal for beginners.
Compressed Air Method
Uses an air compressor with a blowout plug to force all water out of the pipes, leaving them empty.
Experienced RVers who have an air compressor and want a quicker process without the taste of antifreeze in the spring.
Ultimately, both methods work well when done correctly. The important thing is to pick one and see it through.
Think of it this way: An hour or two of work in the fall saves you from a massive headache and an empty wallet come spring. Getting this right means your first trip of the new season starts with planning an adventure, not calling a repair shop.
Your Complete RV Winterizing Checklist
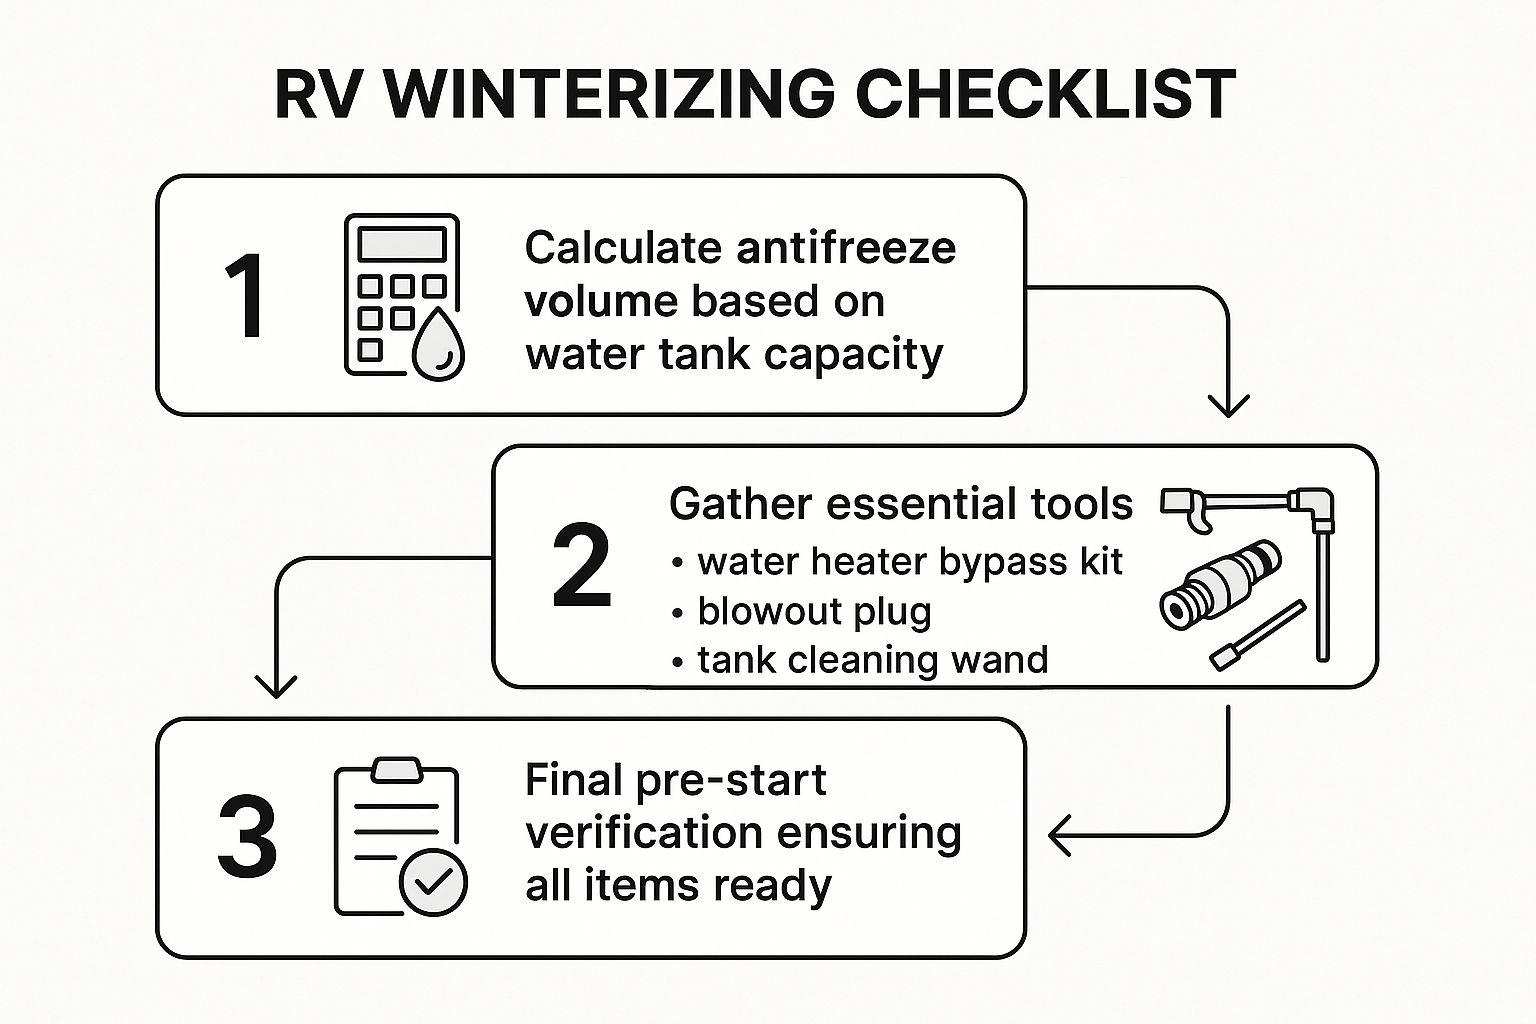
There's nothing worse than getting halfway through a project only to realize you're missing a crucial part. An unplanned trip to the hardware store can kill your momentum. Before you even touch a valve on your RV, let's get every single tool and supply gathered up. Think of it as your pre-winter mission briefing.
First up, the most important supply you'll buy: non-toxic RV/Marine antifreeze. You'll recognize it by its distinct pink color. It's specifically formulated for drinking water systems, so whatever you do, never use the green or orange automotive stuff. Boaters will recognize this product, as it's the same antifreeze used to winterize boat engines and plumbing systems.
A good rule of thumb is to have one gallon for every 10-15 feet of your rig's length. That means if you have a 30-foot travel trailer, you'll probably need 2-3 gallons to be safe. It’s always better to have a little extra than to run out mid-job.
Essential Tools and Hardware
Now, for the hardware. A few specific pieces will make this process go from a frustrating puzzle to a straightforward task. These are the items that let you access and protect the most vulnerable parts of your plumbing.
Water Heater Bypass Kit: This is a non-negotiable part of the process. Without it, you’d waste gallons of antifreeze just filling up your water heater tank—which doesn't need to be winterized this way. Many newer RVs already have one installed, so check behind your water heater first.
Blowout Plug: If you're going the compressed air route to clear the lines, this little brass fitting is essential. It screws right into your city water inlet and gives you a place to connect your air compressor hose.
Tank Cleaning Wand: I can't recommend this enough. After you've drained your black tank, a high-pressure wand helps you get it truly clean, blasting away any stubborn debris.
Getting these specific tools isn't just about making the job easier—it's about doing it correctly. A bypass kit alone can save you $10-15 in wasted antifreeze each year, and a clean tank prevents odors and sensor issues in the spring.
Assembling Your Full Kit
Finally, let's pull together the basic hand tools you probably already have in your garage. You'll definitely want a socket wrench handy for removing the anode rod or drain plug from your water heater. A set of basic wrenches is also a good idea.
Another great addition to your kit is a water pump converter kit. This handy little device lets you draw antifreeze directly from the bottle into your plumbing system, which is a massive time-saver.
This visual guide gives you a great overview of the prep work involved.
As you can see, a successful winterization starts long before you open the first valve. It all begins with careful planning and having everything you need right at your fingertips.
Draining and Protecting Your Water System
Shop RVs For Sale
Browse current rvs from dealers near you — updated daily.
Alright, this is where the rubber meets the road. If you get one part of winterizing right, make it this one. Your entire mission here is to get every last drop of water out of your RV’s plumbing. Why? Because when water freezes, it expands, and that expansion can crack fittings, split pipes, and leave you with a catastrophic mess come springtime. A few minutes of focused work now will save you from thousands of dollars in repairs later.
First things first, let’s tackle the holding tanks. You need to completely empty your fresh, gray, and black water tanks at a proper dump station. I always recommend draining the black tank first, then the gray tank. The soapy gray water does a decent job of flushing out any lingering gunk from the sewer hose.
Once they’re drained, it’s a good idea to give your black and gray tanks a solid rinse. If your rig has a built-in flushing system, use it. If not, a tank cleaning wand snaked down the toilet works wonders. Getting all that debris out now prevents sensor glitches and nasty odors from developing over the winter. Think of it as putting your tanks to bed clean.
The All-Important Water Heater Bypass
Before you even think about grabbing the antifreeze or the air compressor, you have to deal with the water heater. It’s holding several gallons of water that need to be drained separately. Start by making absolutely sure the heater is off (both electric and gas) and completely cool. Trust me, you don’t want to mess with pressurized hot water.
Next, find the drain plug on the outside of the unit. It’s usually a plastic plug or a metal anode rod. Grab a socket wrench, get ready for a gush of water, and carefully remove it. To speed up the process, pop open the pressure relief valve at the top of the heater. This lets air in and helps the water drain out fast.
Crucial Tip: Never, ever pump antifreeze into your water heater. It’s a complete waste of 6 to 10 gallons of antifreeze and an absolute nightmare to flush out in the spring. Bypassing it sends the antifreeze only where it’s needed—into the actual plumbing lines.
Most modern RVs have a bypass kit already installed on the back of the water heater, usually a set of one, two, or three valves. You just need to turn those valves to stop water from flowing into the tank and instead loop it directly from the cold-in to the hot-out line.
Method One: The RV Antifreeze Approach
With the water heater bypassed, you’re ready to introduce that famous pink RV antifreeze. This method is incredibly thorough and gives you great peace of mind, which is why I often recommend it for anyone new to winterizing their RV.
You'll let your RV's water pump do all the work. Many rigs come with a siphoning hose or you can install a simple converter kit that lets the pump draw antifreeze straight from the jug.
Hook It Up: Stick the siphoning tube into a fresh gallon of non-toxic RV antifreeze.
Power the Pump: Flip the switch for your water pump. You’ll hear it hum as it starts pulling the pink liquid into the lines.
Open Every Faucet: Start with the faucet that’s furthest away from the pump—often the kitchen sink or the shower. Open the hot tap and wait until you see a steady stream of pink antifreeze. Close it, then do the same for the cold tap.
Work Your Way Through: Just keep repeating that process for every single water outlet in the rig.
Don't forget the spots people often miss:
The bathroom sink and shower
The toilet (press the flush pedal until pink antifreeze appears in the bowl)
The outdoor shower, if you have one
Any low-point drains you didn't open earlier
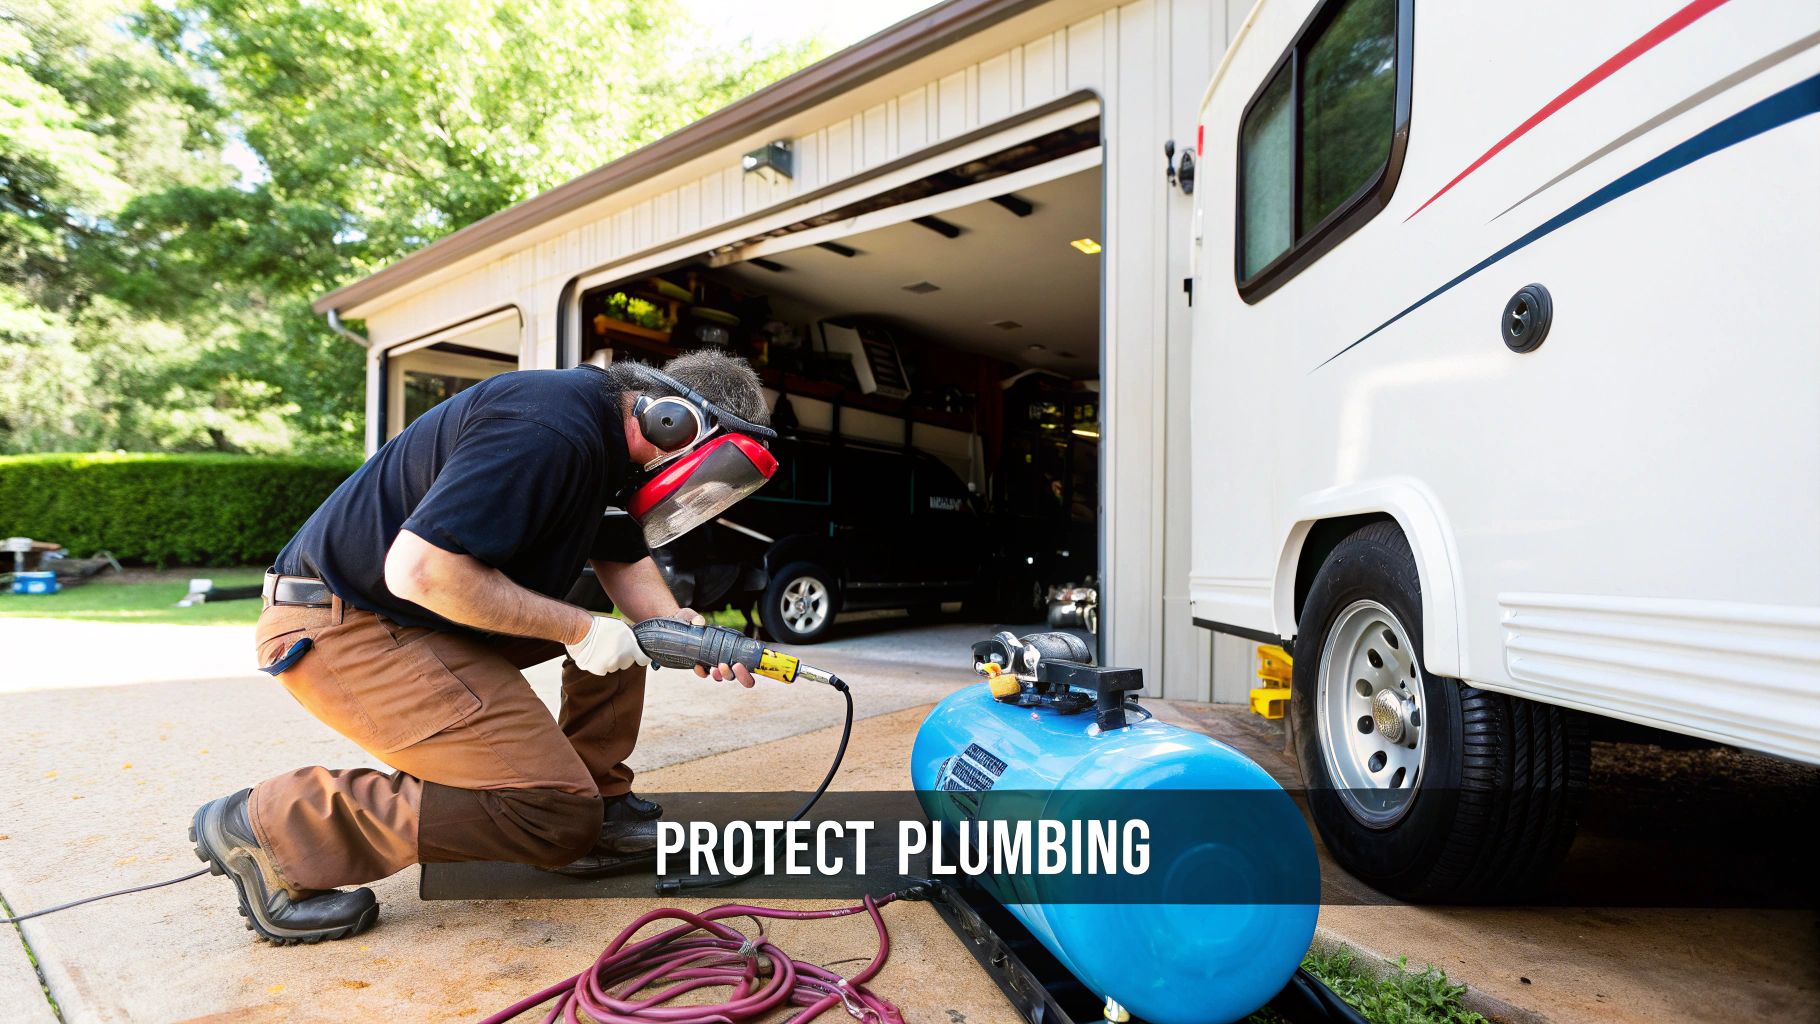
Method Two: Using Compressed Air
If you'd rather not deal with antifreeze, blowing the lines out with an air compressor is another great option. It’s faster, but you have to be careful to do it right.
For this, you’ll need a simple blowout plug that screws into your city water connection. The key here is to keep the pressure low. Set your air compressor's regulator so it never exceeds 40-50 PSI. Any higher, and you risk damaging your plumbing.
Connect the compressor, turn it on, and then, just like with the antifreeze method, go through your RV opening each faucet one by one. Let the air blow through the hot and cold lines until only a sputtering mist comes out. Be methodical, check every tap, and don't forget the toilet and outdoor shower. Once you're done, the lines are empty and safe from freezing.
Preparing Your Appliances and Interior for Storage
Now that your plumbing is safe from the cold, it’s time to head inside. Getting your RV fully winter-ready means prepping every system and space for its long winter nap. Trust me, skipping the interior prep can lead to some nasty surprises in the spring, like mildew, pest infestations, or dead batteries.
Your RV’s refrigerator is a primary target for mold and mildew if you just shut the doors and walk away for months. The first thing you need to do is turn it off, let it defrost completely, and then wipe every surface dry. Don't forget to take out all the food—yes, even those canned goods. A can of beans can easily freeze and burst, leaving you with a real mess.
Once it's spotless and dry, you have to prop the doors open. A lot of RV fridges have a built-in latch designed for this, but if yours doesn't, a simple towel or a small block of wood wedged in the door works perfectly. That continuous airflow is your best defense against finding a musty, moldy science experiment next season.
Managing Your RV Batteries and Propane
Your rig’s house batteries are its lifeblood, and leaving them to fend for themselves all winter is just asking for trouble. Cold weather is a slow killer for lead-acid batteries, and if they discharge completely, they can freeze, crack, and be totally ruined. You've got two solid options here.
The easiest method is to fully charge the batteries and then disconnect them. Just pulling the negative cable is usually enough to stop the slow, phantom drains from things like your CO detector or other sensors.
For the absolute best battery care, though, I always recommend pulling them out entirely. Take them home and store them in a warmer, dry spot like a garage or basement. Set them on a piece of wood—never directly on a concrete floor—and hook them up to a smart battery tender. A good trickle charger will keep them topped off and healthy all winter long.
Your propane tanks need a little attention, too.
Shut Them Down: Make sure you close the service valves on every propane tank.
Inspect and Protect: Give them a quick look-over for any rust or damage. It's also smart to throw a proper propane tank cover over them to shield the valves from ice and snow.
Final Interior Winterizing Tasks
These last few steps are all about deep cleaning and keeping critters out. As soon as the temperature drops, pests start looking for a warm place to hide, and an RV with crumbs is like a five-star hotel for them. This final sweep is what guarantees you a fresh start in the spring.
Start by emptying the pantry and cupboards of all food. I’m talking pasta, crackers, spices—anything a mouse would consider a snack. Once everything's out, vacuum like you mean it. Get into every nook and cranny of your drawers, cabinets, and under the dinette seats.
Next, wipe down all the surfaces to get rid of any sticky residue or spills. This is also the perfect time to pull out your air conditioner's filters and give them a good cleaning. Dust loves to settle over the winter, and cleaning them now is one less thing you'll have to do on your spring shakedown trip.
Look at it this way: you're not just storing your RV, you're preserving your investment. A clean, prepped interior means that when you open that door for the first time next spring, you'll be hit with the promise of adventure, not the stale, musty smell of a long, neglected winter.
Securing Your RV Exterior from Pests and Weather
Once you’ve tackled the plumbing and prepped the inside of your rig for the cold, it’s time to head outside. Think of your RV's shell as its primary armor against winter. Snow, ice, and critters are all looking for a way in, and a thorough exterior check is your best defense to make sure they don't find one. This is all about creating a fortress that will stand strong until your first spring trip.
Your first move is a slow, careful walk-around, inspecting every inch of the roof, siding, and windows. You're hunting for even the smallest cracks or gaps in the sealant. What looks like a tiny gap now can easily become a major leak after a few months of freezing and thawing.
Be sure to grab a tube of RV-specific self-leveling sealant for the roof and a quality lap sealant for vertical surfaces. Don't be tempted to use generic silicone from the hardware store; it just won't hold up to the flexing and temperature swings your RV goes through. Carefully apply fresh sealant wherever you spot any cracking or separation.
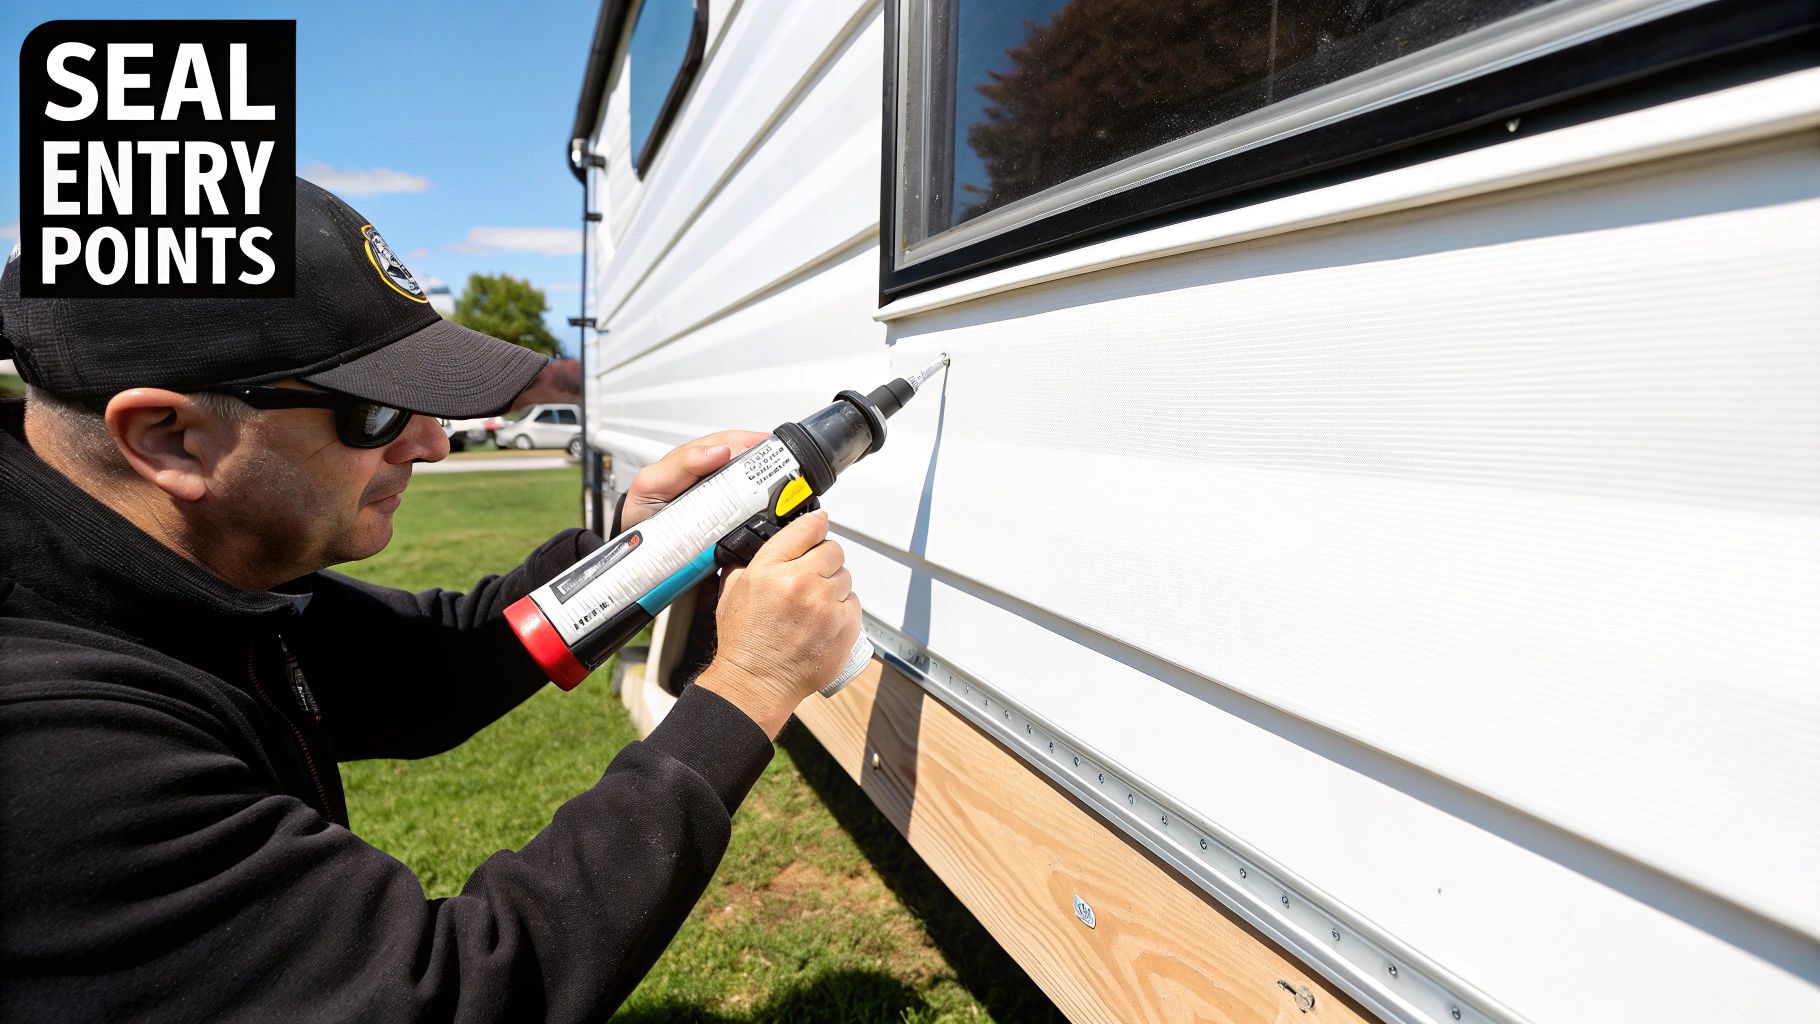
Sealing Entry Points Against Pests
It’s amazing how small a space a rodent can get through—a hole the size of a dime is no problem. And your RV has several openings that might as well have a tiny "welcome" sign on them. The exterior vents for your furnace, water heater, and refrigerator are the most common entry points.
The fix is easy and cheap. You can find simple, easy-to-install mesh screens made specifically for these vents. They allow for proper airflow but create a solid barrier that keeps wasps, mice, and other pests from building a home inside your appliances. It's a small step that can save you from a costly and frustrating infestation come spring.
"A common mistake is overlooking the small details. I knew an RVer who spent hours winterizing his plumbing perfectly, only to find a family of mice had chewed through his wiring over the winter because he forgot to cover the furnace vent. It's a five-minute job that prevents a thousand-dollar problem."
Protecting Seals and Tires
Don't forget about your slide-out seals. These rubber gaskets are constantly exposed to the elements, which means they can dry out and crack over time. A quick application of a specialized rubber seal conditioner will keep them pliable, preventing them from sticking or tearing when you open the slides for the first time next season.
Tires also take a real beating during storage. Sitting in one spot for months on end can create flat spots, while prolonged exposure to the sun’s UV rays will cause cracking in the sidewalls.
Here’s how to prevent that:
Clean and Inflate: Give your tires a good wash and inflate them to the maximum recommended cold pressure, which you can find right on the sidewall.
Cover Them Up: If your RV will be stored outdoors, invest in a set of quality tire covers. They're the best way to block out those damaging UV rays.
Taking these steps ensures your tires stay safe and road-ready. It's also worth noting that properly sealing exterior leaks and insulating windows can reduce interior heat loss by up to 25%. This helps maintain a more stable environment inside the RV, which is key to preventing moisture-related issues. For more great tips, you can learn more about RV maintenance from the RVIA and see how these small jobs contribute to your vehicle's longevity.
Finally, consider one of the best investments you can make for your rig: a high-quality, breathable RV cover. It protects the finish from sun-fading, keeps it clean from bird droppings and tree sap, and adds another layer of defense against rain and snow. Just make sure the cover is breathable—this is critical for preventing moisture from getting trapped underneath, which can quickly lead to mildew.
Answering Your Top Winterizing Questions
Even after you've winterized an RV a time or two, questions pop up. It's totally normal. Getting the details right is what separates a smooth spring de-winterizing from a season of expensive repairs. Let's tackle some of the most common things people ask.
Can I Use Car Antifreeze in My RV?
This is a big one, and the answer is a hard no. Never, ever use automotive antifreeze in your RV's plumbing system. That stuff is toxic.
You absolutely must use a non-toxic RV/Marine antifreeze, which is usually pink. It's specifically designed for potable water systems in recreational vehicles and boats. Using the wrong kind will contaminate your freshwater tank and lines, making the water unsafe to drink or cook with, even after you think you've flushed it all out.
When Is It Actually Time to Winterize?
So, how cold is too cold? The golden rule is to get the job done before the first hard freeze. We're talking about when the forecast calls for temperatures to drop below 32°F (0°C) for more than just a fleeting moment.
Don't procrastinate. An unexpected cold snap can roll in and do serious damage to your pipes and water heater before you have a chance to react. It’s always better to be a week early than a day late.
"Oops, I Messed Up." Now What?
Mistakes happen. One of the most common slip-ups is forgetting to bypass the water heater before adding antifreeze. If you find yourself with a water heater full of pink fluid, don't panic. You've just created a bit of extra work for yourself.
You'll need to drain the water heater completely. Open the pressure relief valve and pull the drain plug. Once it's empty, you have to flush it—and I mean really flush it. It will take a ton of fresh water and several rounds of rinsing to get every last trace of the antifreeze taste and smell out of that tank.
Here's a piece of wisdom you'll hear from seasoned RVers: It doesn't matter if you use antifreeze or compressed air. What matters is that you're thorough. A rushed job is almost always a bad job, and that’s how you end up with cracked pipes.
Antifreeze vs. Compressed Air: The Great Debate
This brings us to the big showdown: antifreeze or compressed air? Honestly, both methods work great when you do them right. The "best" choice really boils down to your personal preference.
Compressed Air: This is the faster method, and it means you won't have any of that lingering antifreeze aftertaste in your water come springtime. The downside? You need an air compressor, and there's a tiny risk that a few drops of water could get trapped in low points of the plumbing if you aren't careful.
Antifreeze: This method is often seen as more foolproof. The pink stuff physically pushes out all the water, which gives a lot of people extra peace of mind. The main drawback is the extensive flushing you'll need to do in the spring to get rid of that distinct taste.
For the ultimate belt-and-suspenders approach, some old-timers do both. They'll blow out the lines with air first to get most of the water out, then pump in antifreeze just to be absolutely certain every last drop is protected.
The Searchshop editorial team researches and writes buying guides, model reviews, and category roundups across RVs, boats, motorcycles, ATVs, autos, and snowmobiles. We combine hands-on product research, live dealer inventory data, and manufacturer specifications to help buyers make confident decisions.
Reviewed by Searchshop Review Board — credentialed industry professionals.